BY Brimly.March 11, 2025Gluten-Free Marbled Sugar Snap Cookies
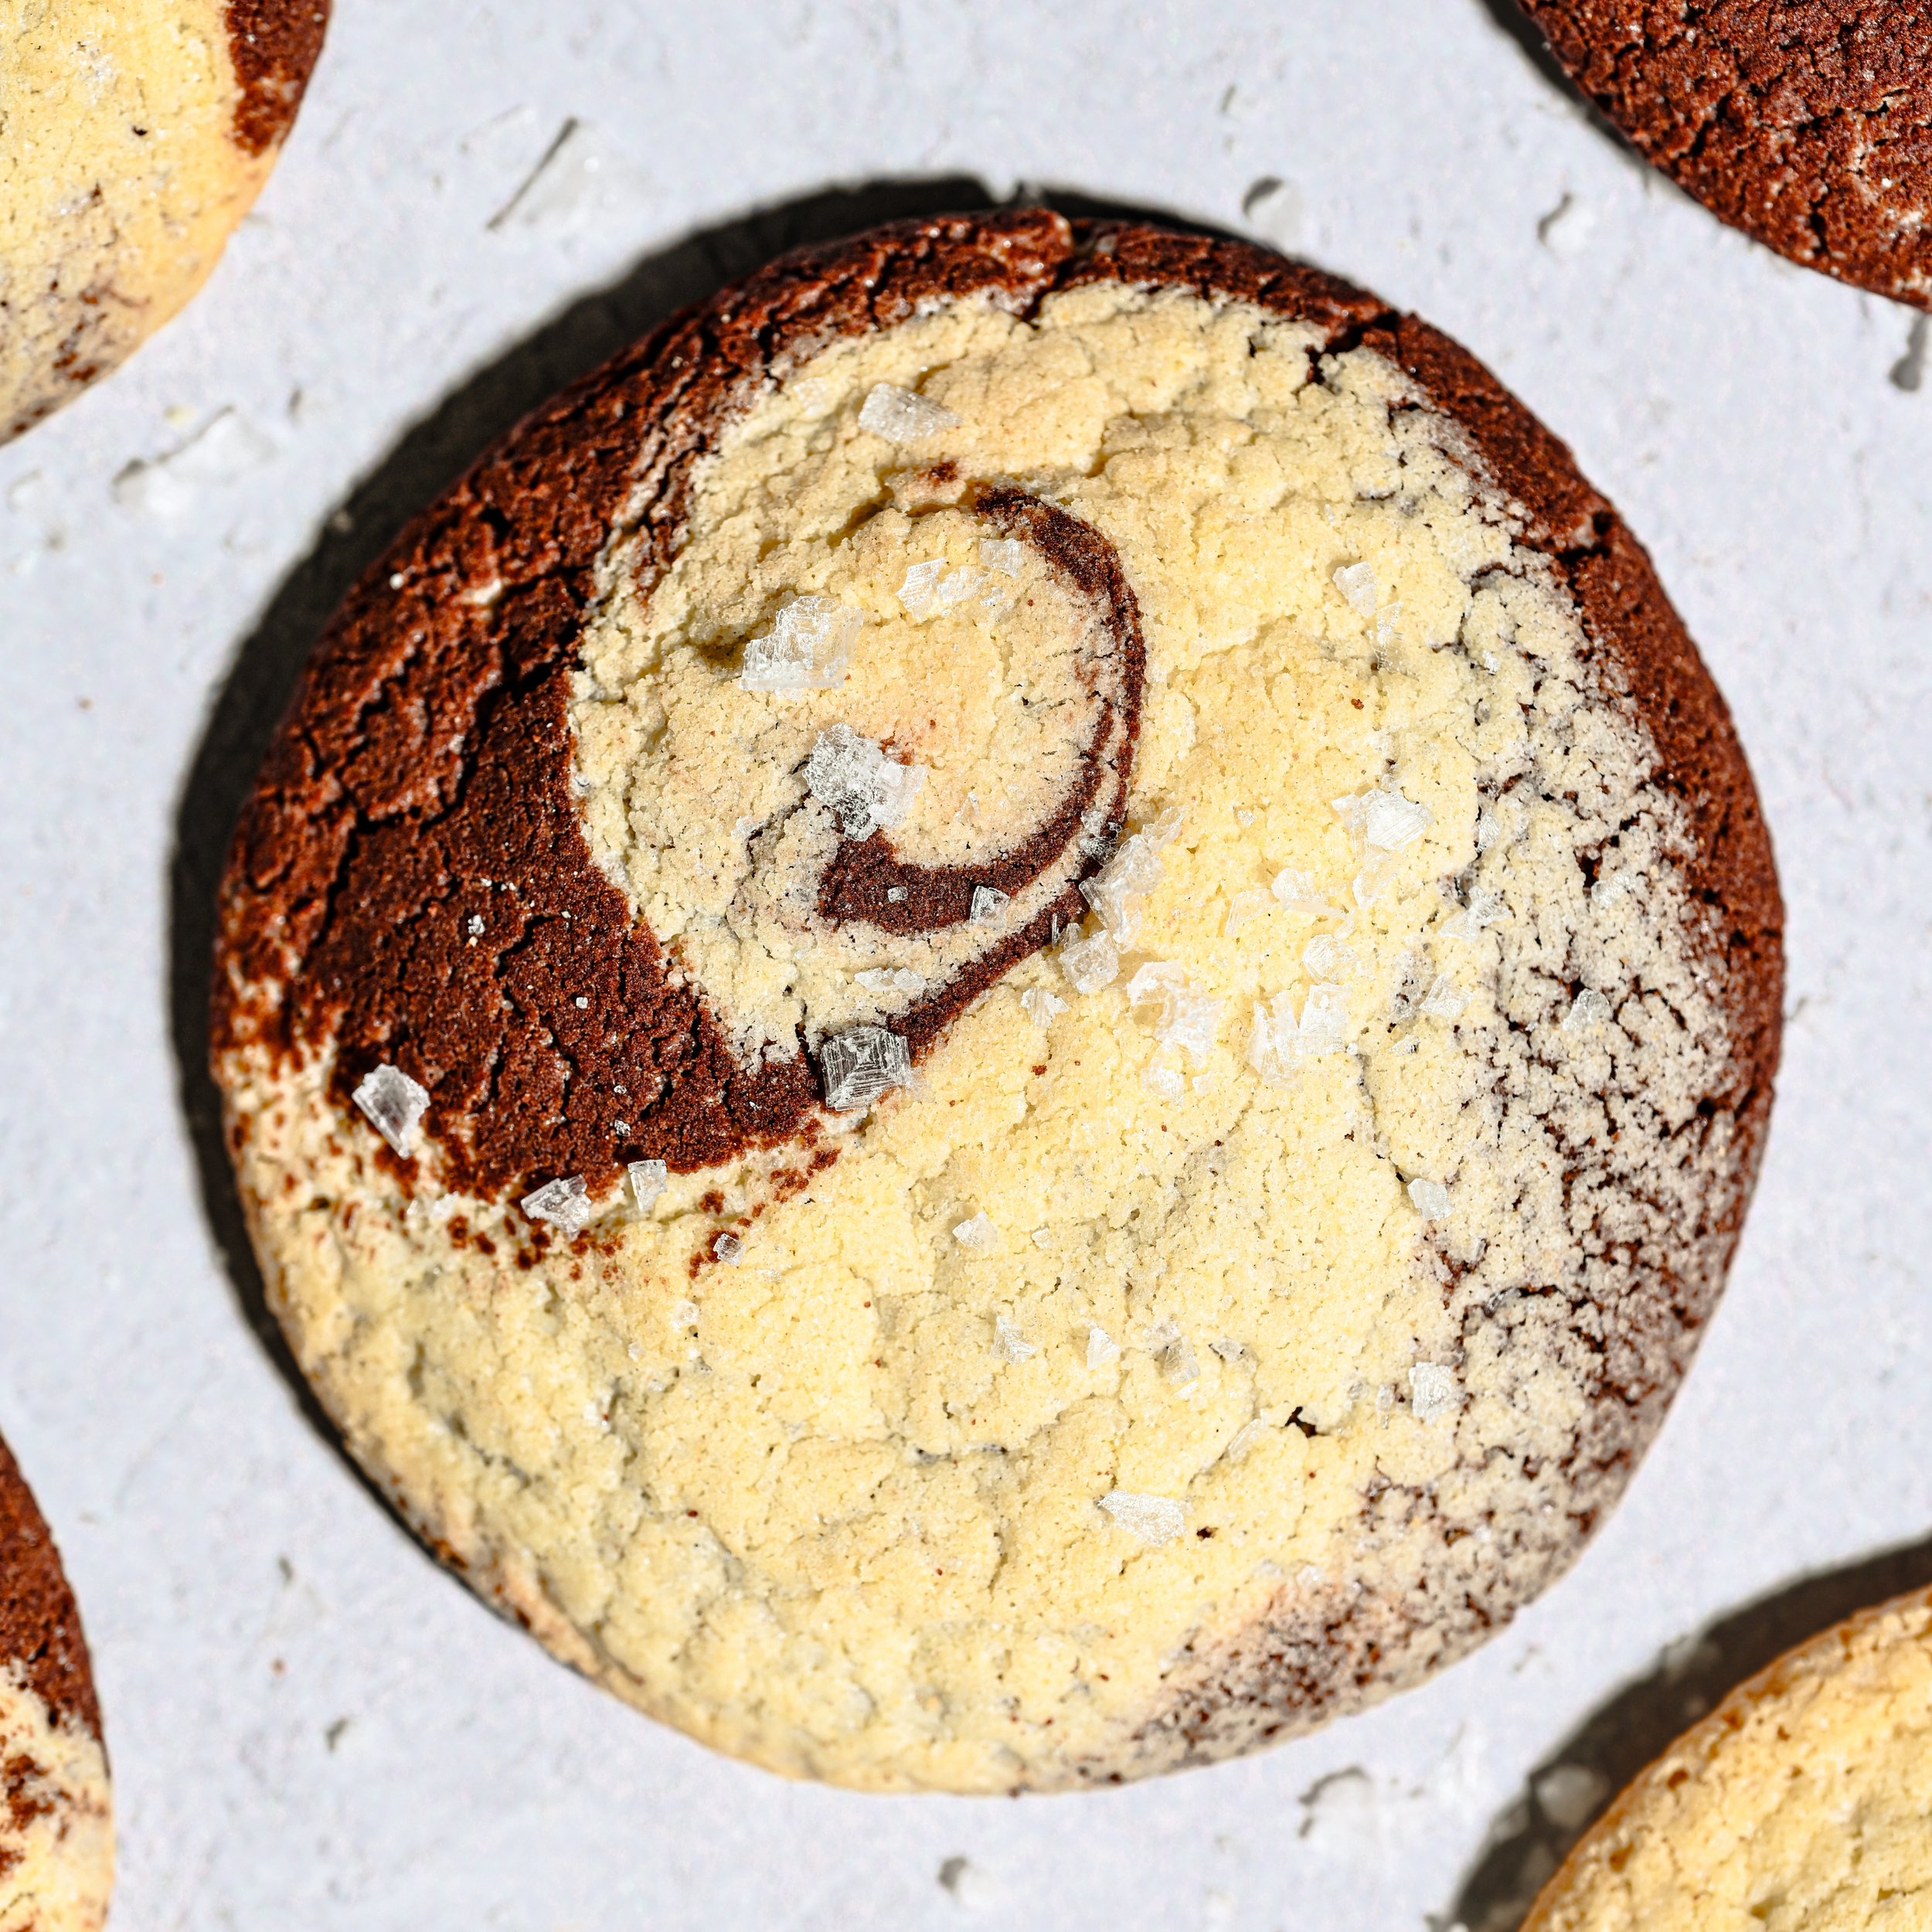
Photo By Editors @ the Brimly Test Kitchen


Novice Cook45 minutesGluten-freeSweet Treat Now, Why This Recipe and What Makes It Special?
This Marbled Sugar Snap Cookie is an absolute breakthrough cookie for me. It’s something I’ve been thinking about making for a long time, but I hesitated because, well—gluten-free baking. If you’ve ever worked with gluten-free dough, you know it can be unpredictable, especially without any gums or stabilizers. That alone made this recipe feel like an even bigger challenge. But if there’s one thing about me, it’s that I love a challenge.
This cookie is a beautiful swirl of chocolate and vanilla sugar cookie dough, creating a mesmerizing marbled effect. The process is surprisingly simple: mix your gluten-free flour, sugar, salt, baking soda, butter, vanilla extract, and a little milk to create a sugar cookie dough. Then, split the dough in half—one part stays vanilla, and the other gets transformed with cocoa powder and a bit more milk. Once you combine them, you get stunning, bakery-style marbling that looks as impressive as it tastes.
This recipe is special because when I first started eating gluten-free, I didn’t think I’d ever be able to enjoy cookies like this again—cookies that look just like the ones you’d find on a grocery store shelf but without all the additives, gums, and gluten. Creating this recipe felt like a huge accomplishment because I’ve tested so many cookies over time, tweaking and adjusting to find the right balance. But this one? It came together more easily than expected, and the results were even better than I imagined.
It’s a fun, simple recipe that brings so much joy to gluten-free baking. The best part? It’s also soy-free, based on the ingredients I carefully selected. You can make this in under an hour, and it’s perfect for baking with kids—it’s creative, visually stunning, and, most importantly, delicious.
I also created this recipe because I wanted something beyond just a plain gluten-free cookie. I had seen marble cookies in cookbooks and online, but I never thought I could make a gluten-free version that would actually work. Gluten-free dough is usually softer and more delicate—you often pour it rather than shape it. But in this case, I was able to roll the dough into balls and bake them just like traditional cookies. That’s what makes this recipe so special. It’s proof that there’s always a way—if you’re determined and willing to experiment, you can make anything happen in gluten-free baking.
Ingredient Call-Outs and Swaps
Cocoa Powder: I used Dutch-process cocoa powder for a richer, deeper chocolate flavor. It made all the difference in bringing out the chocolate notes in this cookie. If you don’t have Dutch-process, you can use regular cocoa powder, but the flavor may be slightly less intense.
Gluten-Free Flour: My go-to is King Arthur’s Gluten-Free, Xanthan Gum-Free Flour. While this flour doesn’t work for every recipe, it worked perfectly here. If you’re wondering what flour to use for this recipe, this is a solid choice.
Oil for Handling the Dough: Because this is a gluten-free dough, it tends to be stickier than traditional cookie dough. To make rolling easier, I lightly oiled my hands with vegetable oil. This small step made shaping the dough so much smoother. If you’re wearing gloves, oil the gloves as well to prevent sticking. But don’t overdo it—you don’t want too much oil altering the dough’s texture.
Lessons Learned
Getting the Right Dough Consistency
When you split the dough in half and add cocoa powder to one portion, you’ll notice that the chocolate dough might be a slightly different texture than the vanilla dough. If it feels too dry, add a tiny splash of milk to balance it out. If it’s too wet, add a sprinkle of flour. The key is making sure both doughs have a similar texture so they combine properly when swirled together. Otherwise, one might absorb the other, and you won’t get that pretty marbled look.
Measuring for Even Swirls
To get evenly sized cookies, use a kitchen scale to divide both doughs into equal portions. I found that rolling each dough into 12 equal pieces before combining them gave me the best results. That way, every cookie had an even balance of chocolate and vanilla without one overpowering the other.
Swirling Doesn’t Have to Be Perfect
Don’t stress if your cookies don’t all have perfect swirls—that’s part of their charm! Some will have beautiful marbling, while others may be more blended. As long as they look somewhat marbled, they’re good to go.
Room Temperature Ingredients Matter
Using softened butter (not melted) and room temperature milk makes a huge difference in how smoothly the dough comes together. If your butter is too cold, it won’t mix properly. If your milk is too cold, it can stiffen the dough.
Rolling Technique for Different Cookie Looks
You can play around with how you shape these cookies. Instead of just combining the two doughs and rolling them into balls, you could:
Layer them and roll them into a log, then slice for a more striped effect.
Press them together more loosely for a more dramatic swirl.
Alternative Flavor Ideas
Matcha Variation: Swap the cocoa powder for matcha powder to create green-and-white marbled cookies. If using matcha, add it one teaspoon at a time to control the color and flavor intensity.
Flavored Extracts: Instead of vanilla extract, try lemon, almond, or even coconut extract for a different twist.
Turbinado Sugar Topping: Sprinkling coarse sugar on top before baking gives these cookies an extra crunchy, bakery-style finish.
How to Make It Your Own
This recipe is incredibly versatile, and there are so many ways to put your own spin on it!
Try a Different Type of Cocoa Powder: I used Dutch-process, but regular cocoa powder or even black cocoa powder (for an Oreo-like flavor) would work.
Make It Chocolate Chip Marble Cookies: Add some mini chocolate chips into the dough before rolling it into balls.
Turn It Into Cookie Sandwiches: Bake the cookies slightly larger and use buttercream frosting, Nutella, or peanut butter as a filling between two cookies.
Roll It Differently: Instead of making round cookies, you can roll the dough out into sheets, layer them, and roll them into a spiral log before slicing.
Summary Notes:
This Marbled Sugar Snap Cookie is such a fun and rewarding gluten-free recipe. It’s visually stunning, easy to make, and proves that you don’t need gluten or gums to create a bakery-worthy cookie. If you go for the classic chocolate-vanilla swirl, swap in matcha, or add a fun topping, this recipe is an exciting one to experiment with.
If you give it a try, let us know in the comments! We’d love to hear how you customized it and what fun flavors you came up with.
At Brimly, we take pride in presenting you with the finest products that our editors independently handpicked. In the spirit of transparency, we want you to know that we may earn an affiliate commission when you purchase something through the retail links below.
Essentials you’ll need:


view:
LISTENIngredients
Base Dough:
1 ½ cups gluten-free all-purpose flour
½ cup sugar, granulated
¼ cup unsalted butter, softened
¼ tsp baking soda
¼ tsp kosher salt
3 ½ Tbsp milk
1 tsp vanilla extract
Chocolate Dough:
1 ½ Tbsp cocoa powder, dutch processed
1 ½ Tbsp milk
Recipe Steps
Step 1
Preheat your oven to 350°F (175°C) and line a baking sheet with parchment paper or a baking mat.
Step 2
In a mixing bowl, combine the gluten-free flour, sugar, baking soda, and salt.
Step 3
Add the softened butter and vanilla extract to the dry ingredients. Mix until the mixture resembles coarse crumbs.
Step 4
Gradually add the milk, one tablespoon at a time, mixing until a soft dough forms.
Step 5
Divide the dough into two equal portions. To one portion, add the cocoa powder and additional milk. Knead until fully incorporated.
Step 6
Divide both doughs into 12 equal balls. Take one ball of each (plain and chocolate), gently press them together, and roll to create a marbled effect. Flatten slightly and place on the prepared baking sheet.
Step 7
Bake for 15-18 minutes or until the edges are set and slightly golden.
Step 8
Let the cookies cool on the baking sheet for a few minutes before transferring them to a wire rack to cool completely.
Note:
Store cookies in an airtight container at room temperature for up to a week, or refrigerate to extend freshness.
More From Brimly.

by Brimly kitchen
by Brimly kitchen
by Brimly kitchen
by Brimly kitchen